How to Open Hp Envy X360 M6 Convertible
Today I am taking apart an HP ENVY x360 Convertible PC model 15-aq155nr.
It's likely this disassembly guide will work for some other models in the HP ENVY x360 Convertible line. Here are some of them:
15-aq001nx, 15-aq001na, 15-aq018ca, 15-aq050nw, 15-aq055na
15-aq118ca, 15-aq155nr, 15-aq166nr, 15-aq173cl
STEP 1.
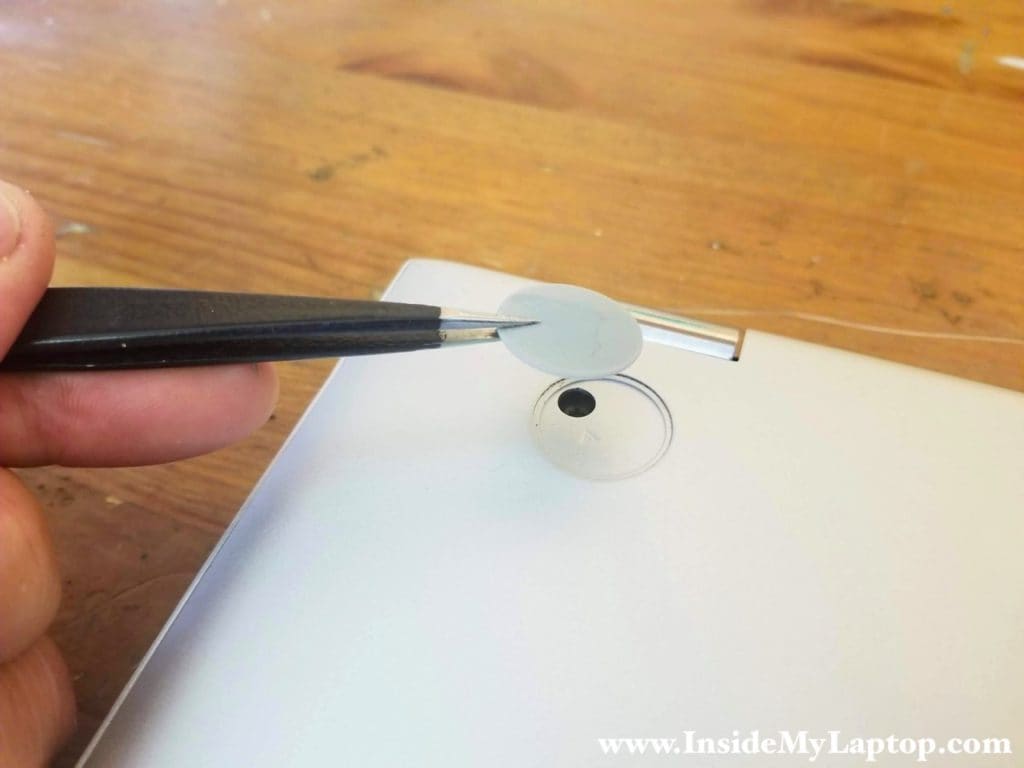
In order to remove the bottom cover we'll have to remove all screws from the bottom. Two screws are hidden under the top left and right rubber feet.
You can remove the rubber foot with tweezers. It's attached to the bottom cover by adhesive tape.
STEP 2.
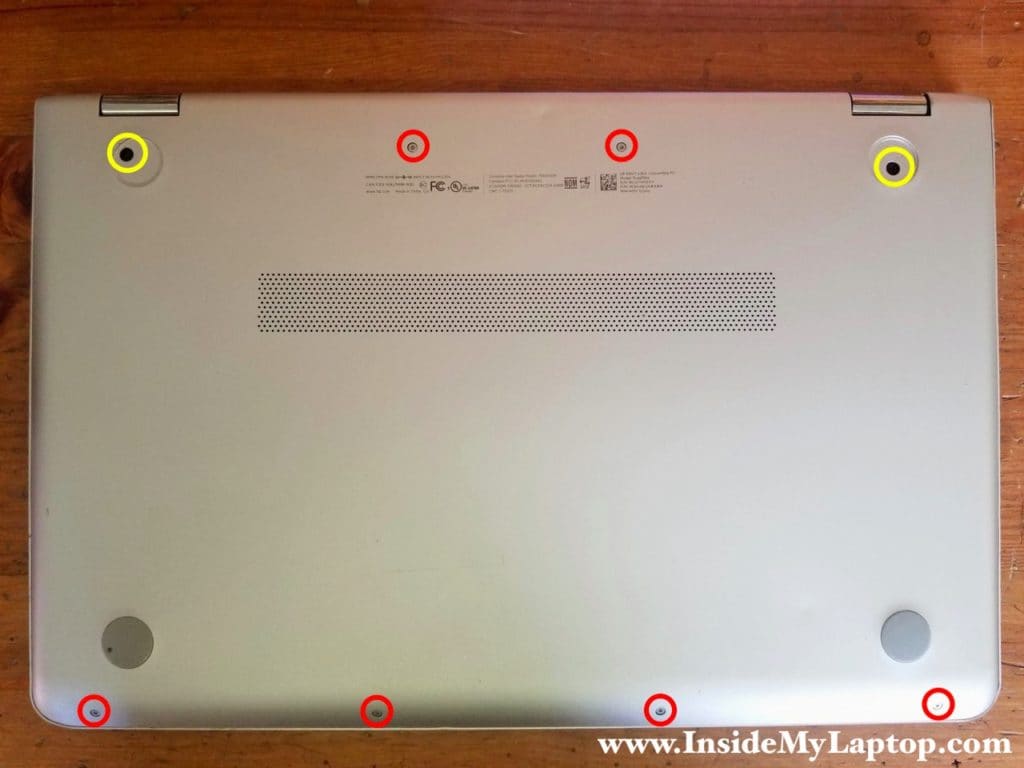
There are six Torx5 screws (red) and five Phillips screws (yellow).
Remove all of them.
STEP 3.
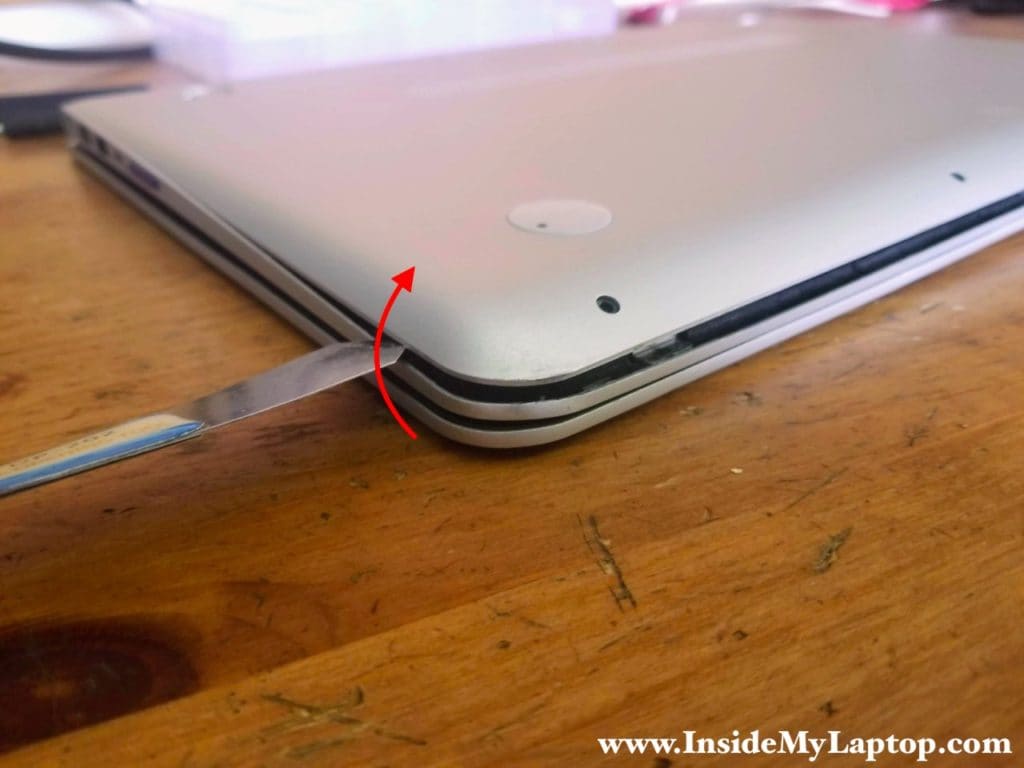
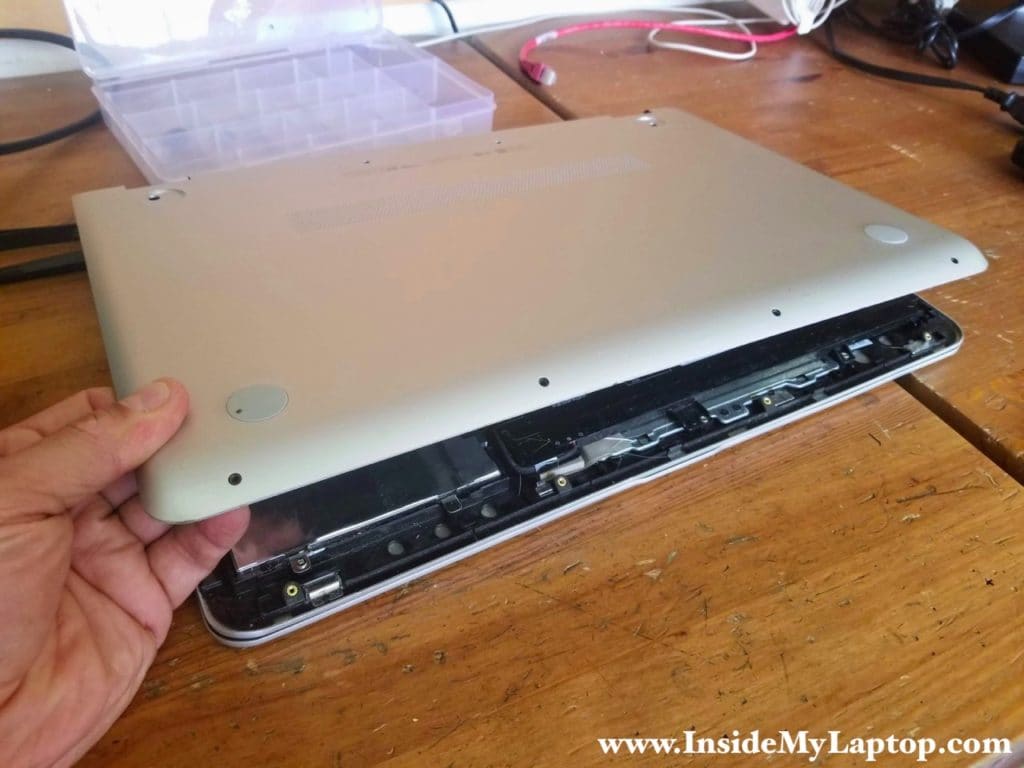
Start separating the bottom cover from the palmrest assembly using a thin case opener tool. Move the case opener along the side of the cover and wiggle to disengage hidden latches. Pry up the bottom cover a little bit.
STEP 4.
Remove the bottom cover.
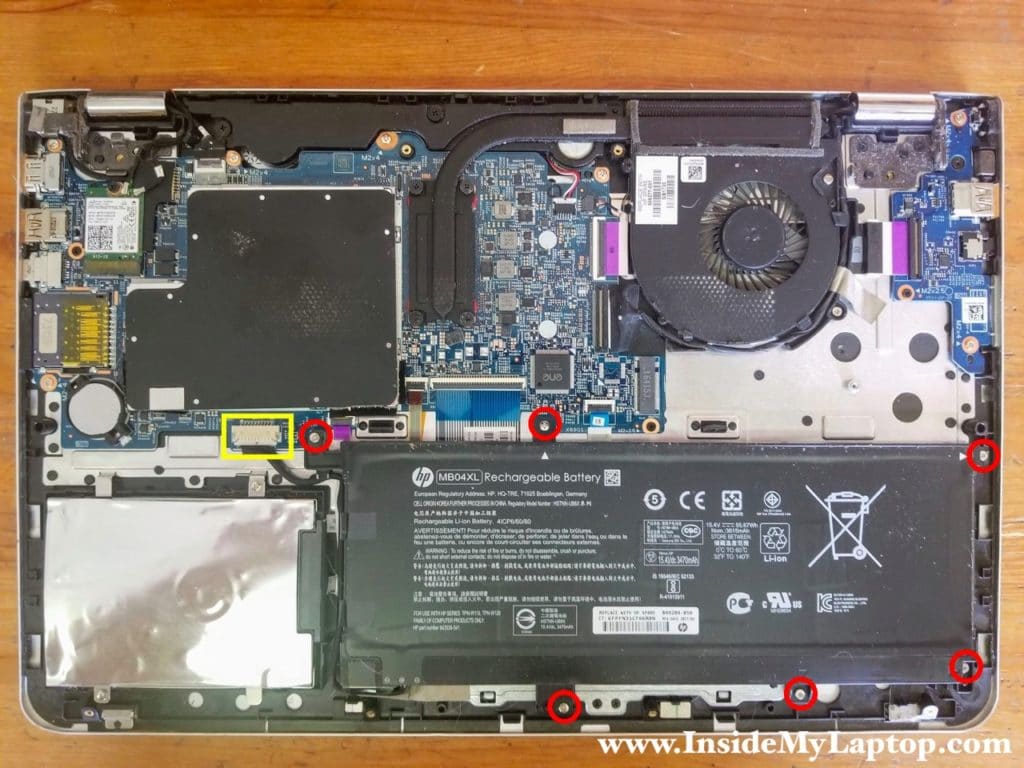
STEP 5.
Remove six screws securing the battery. Disconnect the battery cable from the motherboard.
By the way, the system battery (CMOS) can be easily accessed too. It's a regular CR2032 Lithium 3V coin battery located just below the SD card reader.
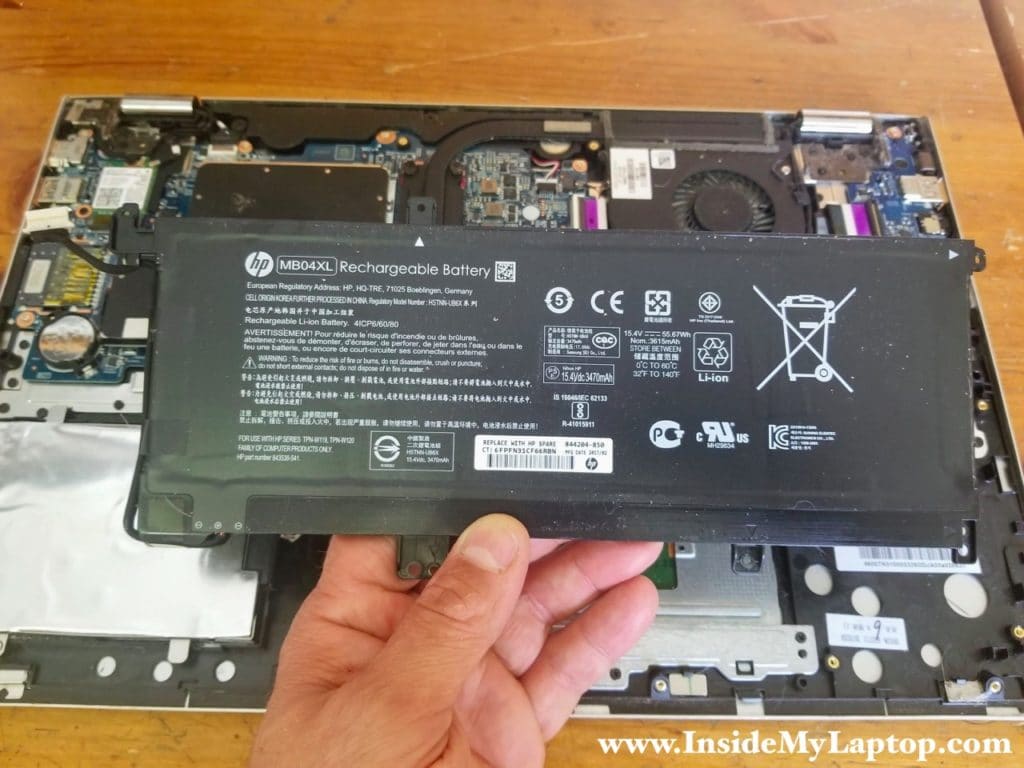
STEP 6.
Remove the main battery. If you are replacing it, I would recommend using a genuine HP battery instead of third-party replacements.
You can find a replacement using battery model number MB04XL or HP spare part number 844204-850.
STEP 7.
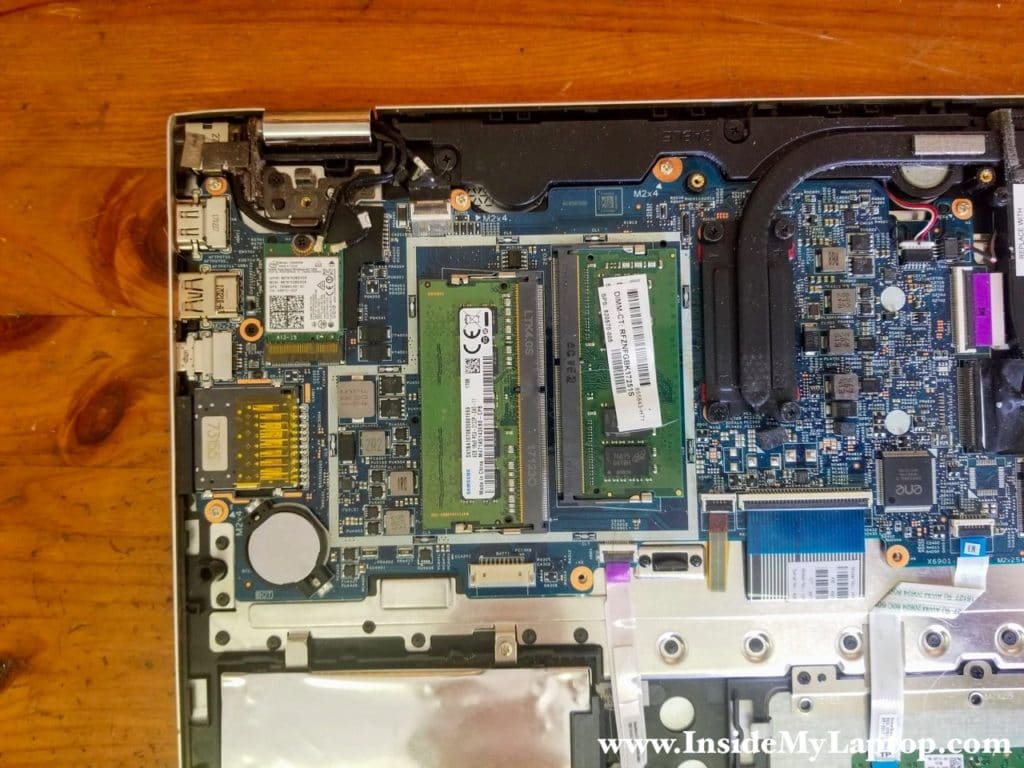
Remove the memory cover. Just lift it up to separate from the motherboard.
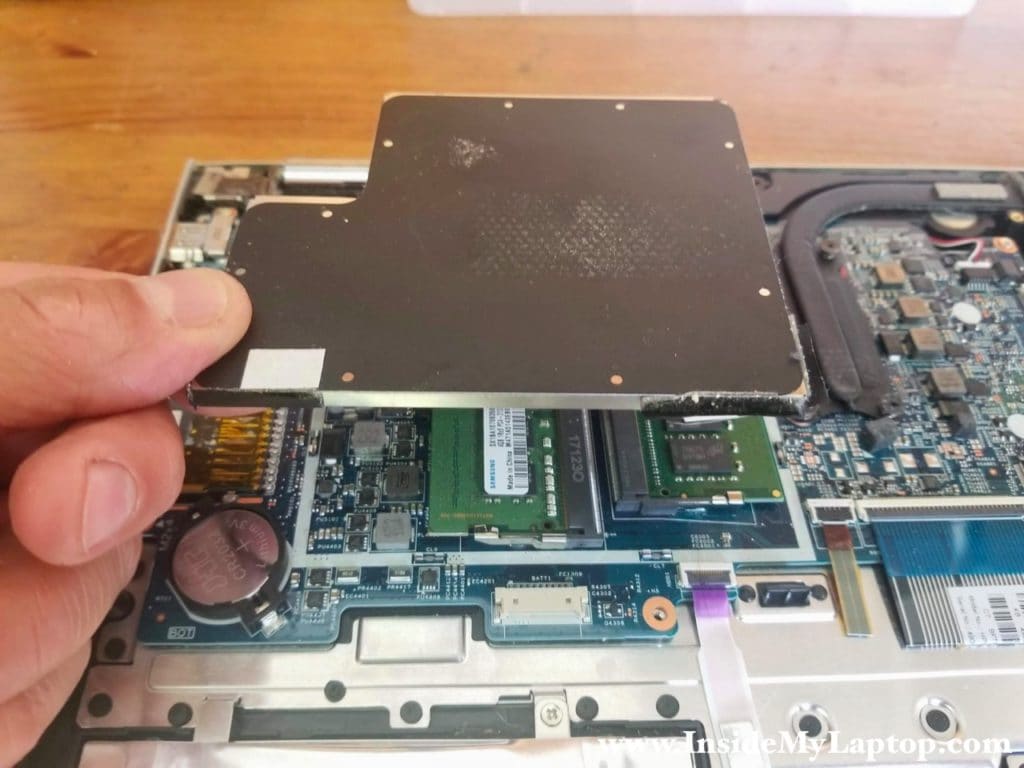
STEP 8.
HP ENVY x360 Convertible PC motherboard has two memory slots. It can handle up to 16GB (8GBx2) DDR4 2400/2666/3200 SODIMM RAM modules.
STEP 9.
Remove two screws securing the 2.5″ hard drive caddy and disconnect the hard drive cable from the motherboard.
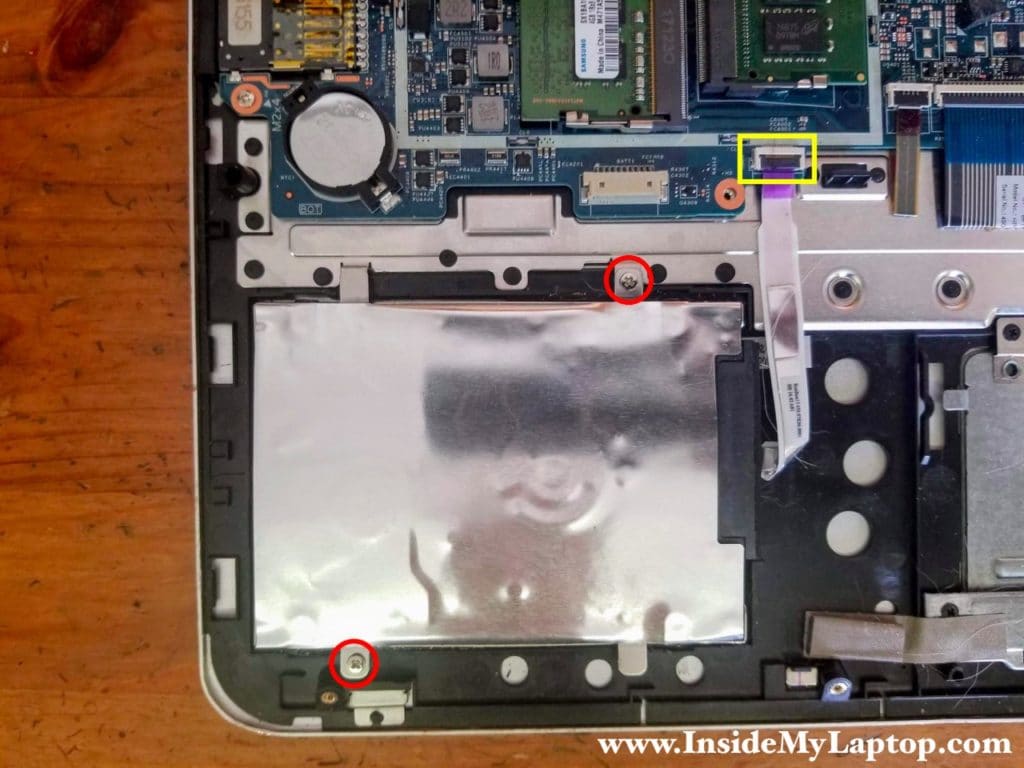
Here's how to unplug the cable.
Lift up the locking tab first (red arrow) and carefully pull the cable out (yellow arrow).

STEP 10.
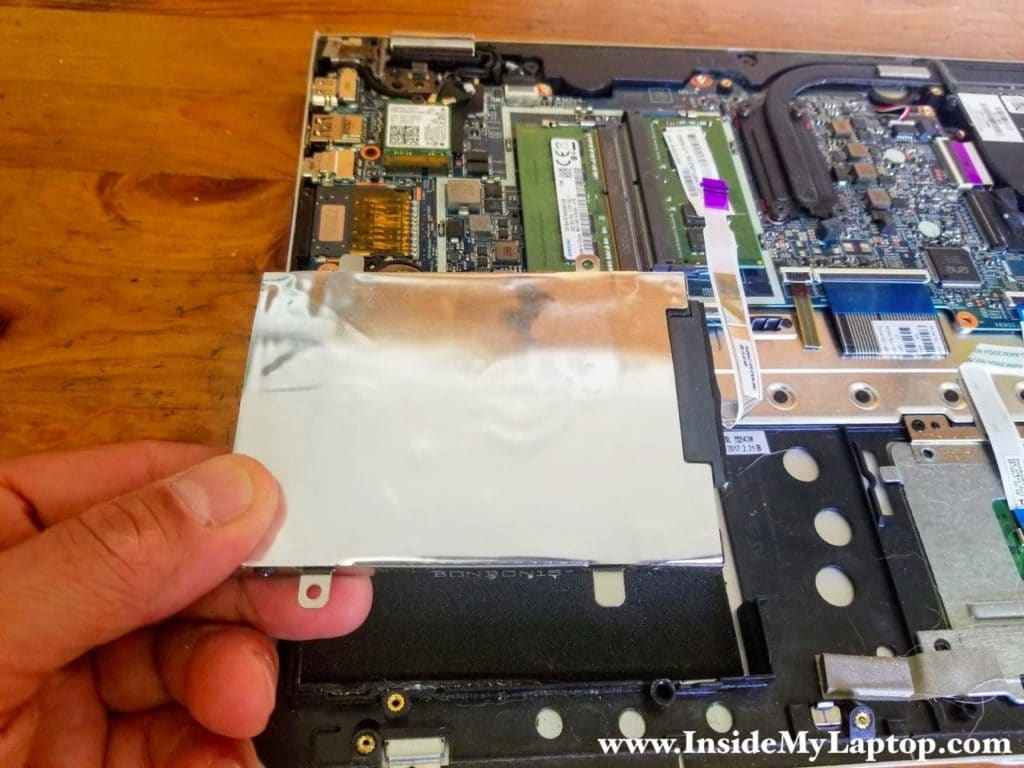
Remove the hard drive assembly with the cable attached.
Upgrading this regular hard drive to a solid state drive will speed up the system significantly.
STEP 11.
Remove three screws securing the USB audio board.
There are two M2x4 silver screws and one M2x2.5 black screw.
Disconnect the flat cable from the board.
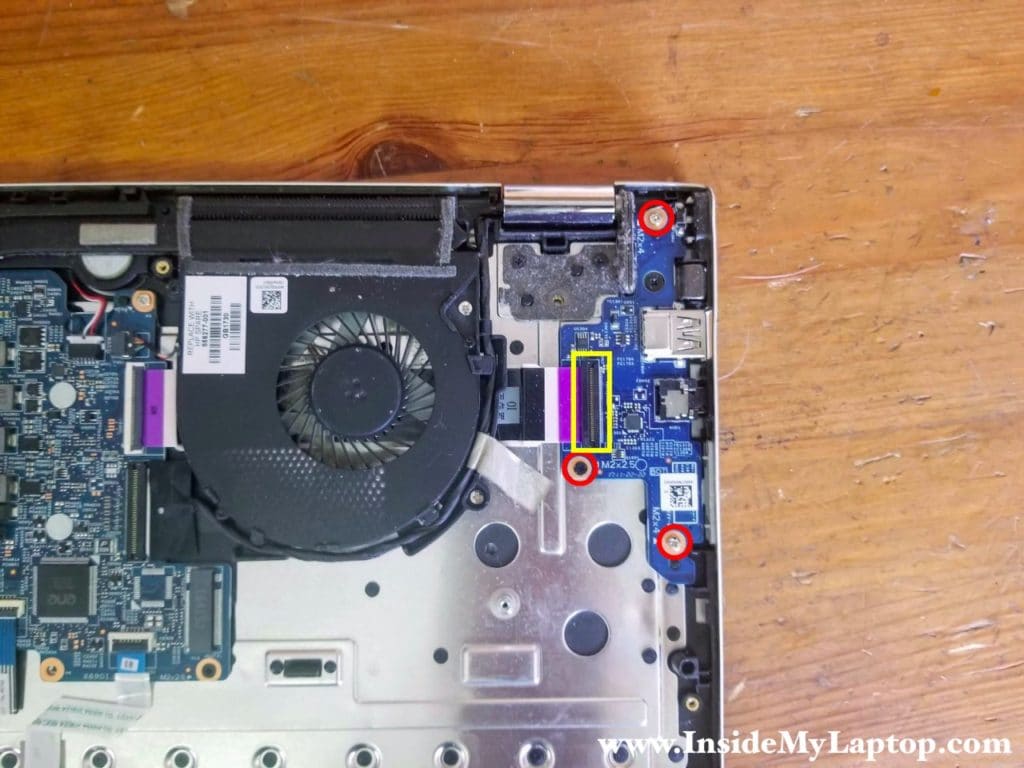
Again, in order to unplug the cable you'll have to unlock the connector first.
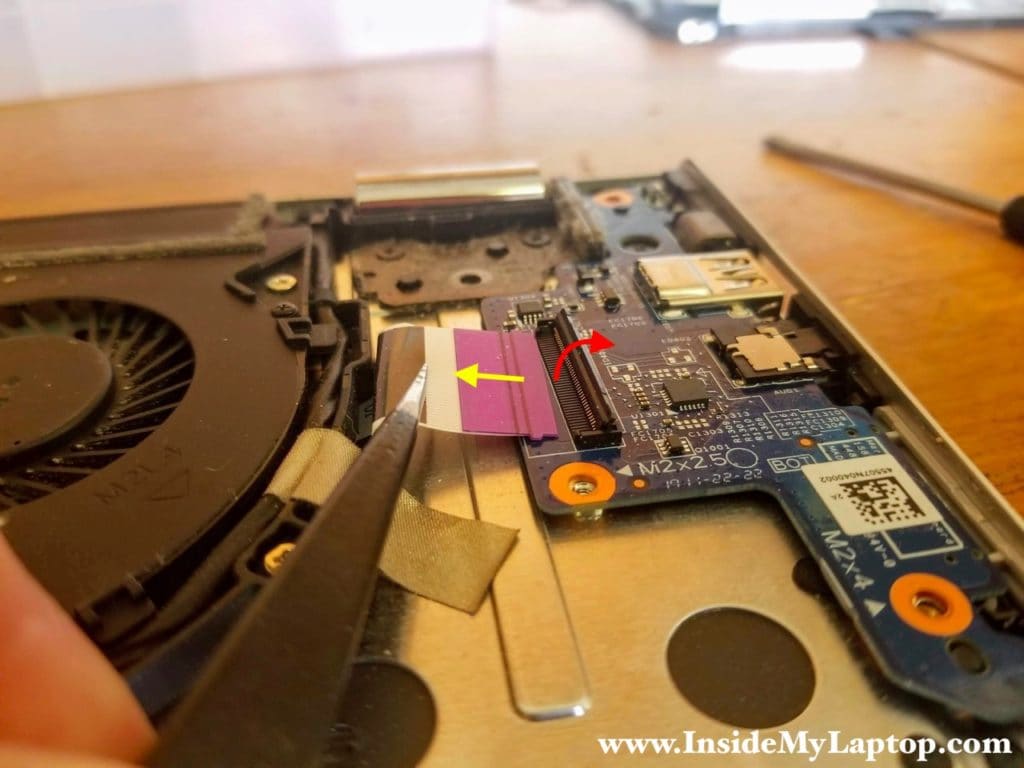
STEP 12.
Remove the USB audio board from the laptop.

STEP 13.
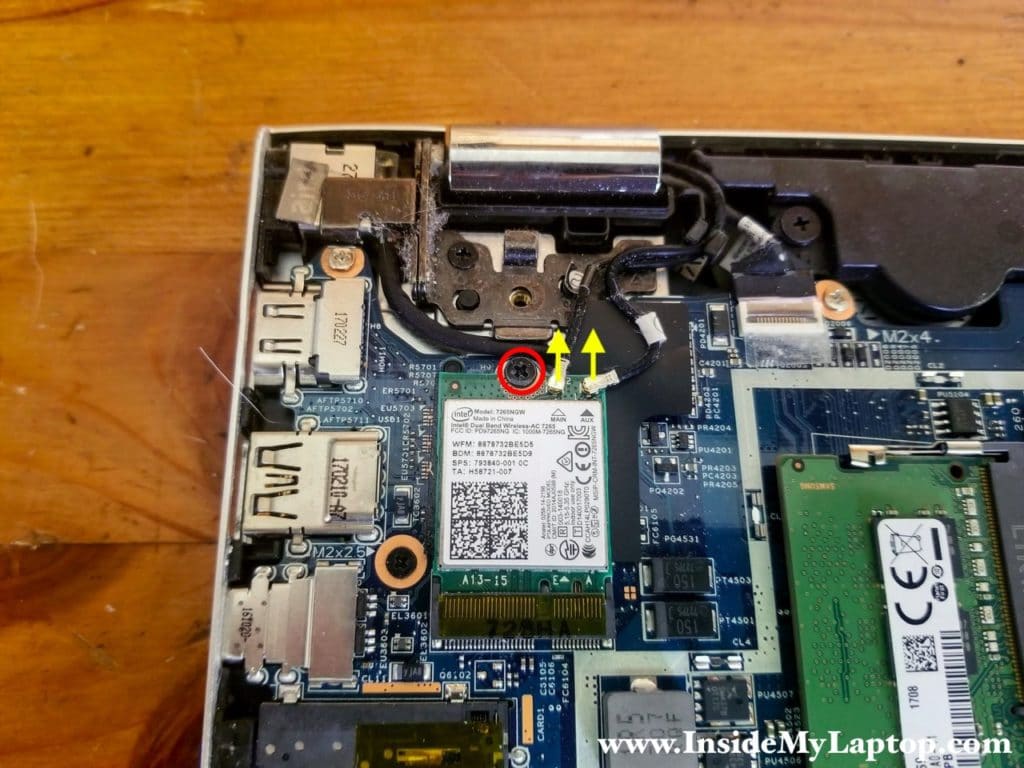
Remove one screw securing the wireless card.
Unplug both wireless card antenna cables. Simply lift up the metal connector up to unsnap it from the card.
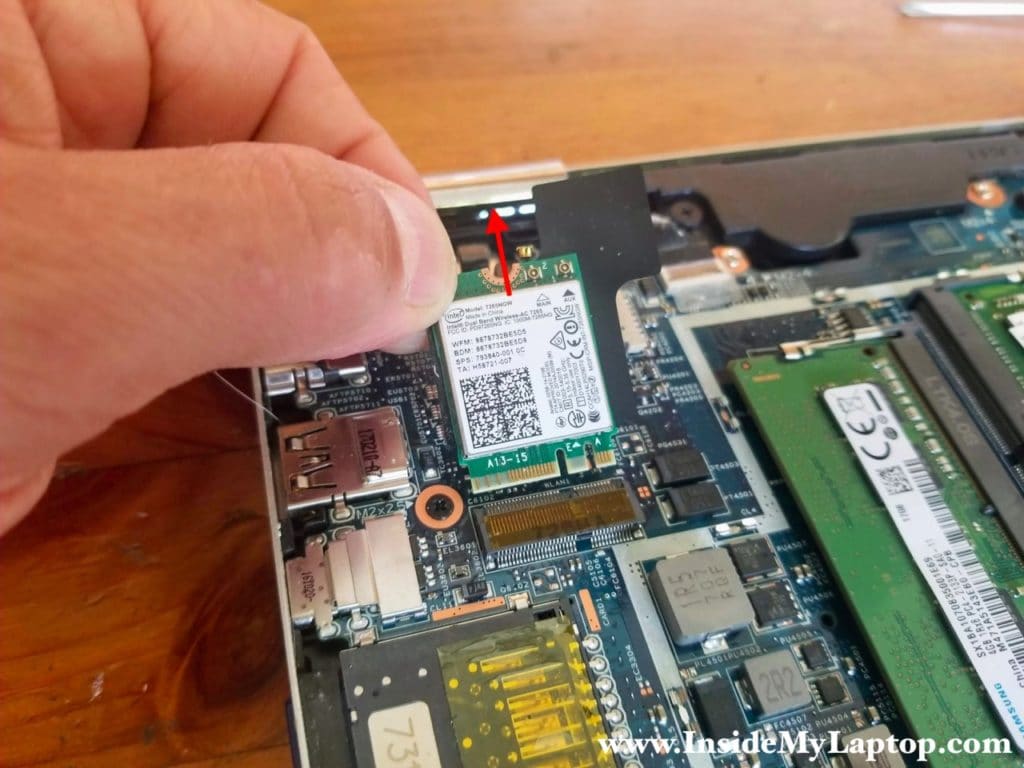
STEP 14.
Pull the wireless card out.
STEP 15.
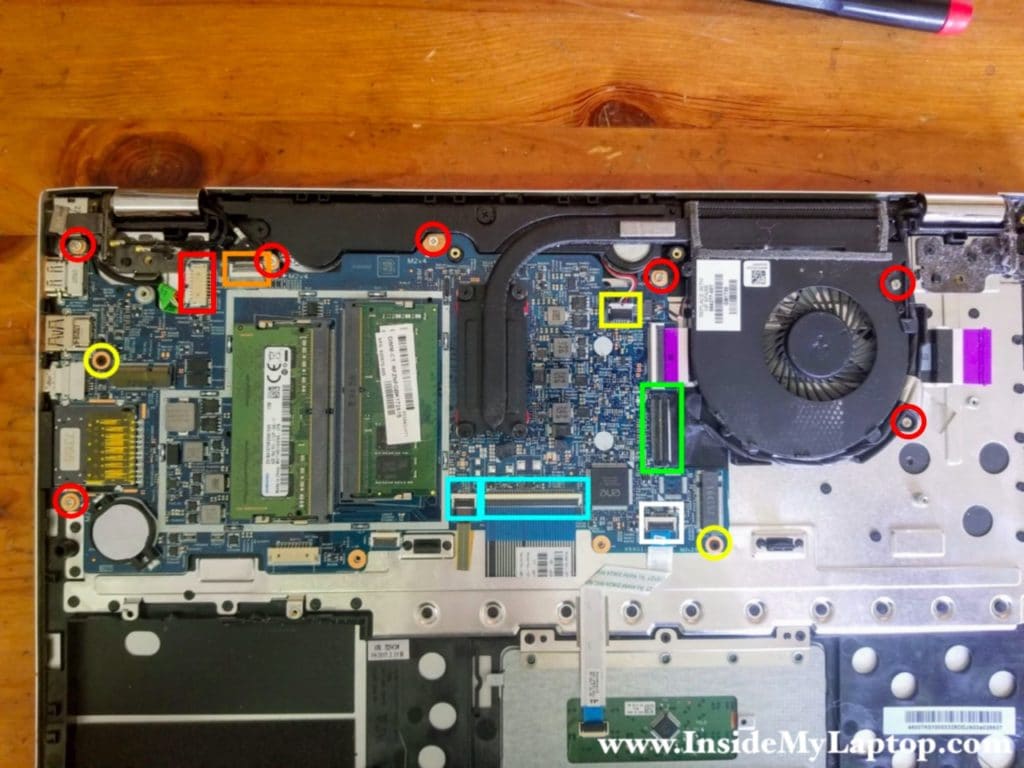
Remove seven screws securing the motherboard. There are five M2x4 screws (red) and two M2x2.5 screws (yellow).
Remove two screws from the cooling fan assembly, also M2x4.
Disconnect all following cables:
– DC power jack cable(red square)
– Webcam cable (orange square)
– Speaker cable (yellow square)
– Display video cable (green square)
– Trackpad cable (white square)
– Keyboard and keyboard backlight cables (blue squares)
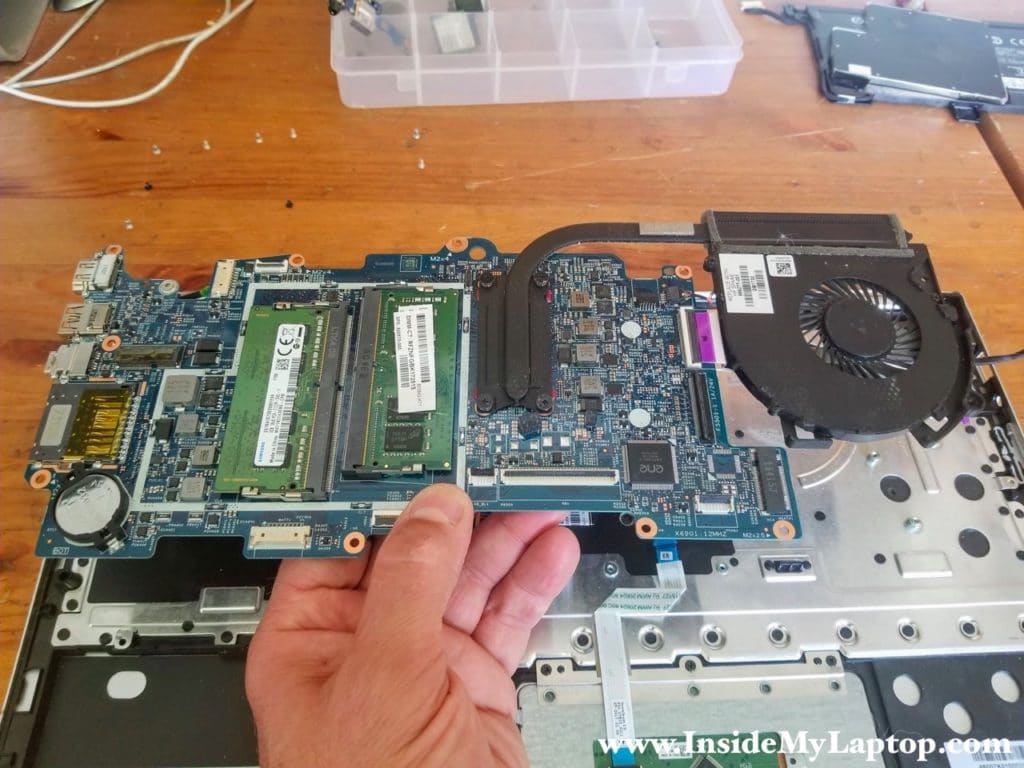
STEP 16.
Unroute the display cable from the guided path on the right side of the fan.
Carefully lift up the motherboard and remove it from the laptop.
By the way, the cooling module can be removed without taking the motherboard out. If you need to replace the fan, you can find a new assembly using HP spare part number 856-277-001.
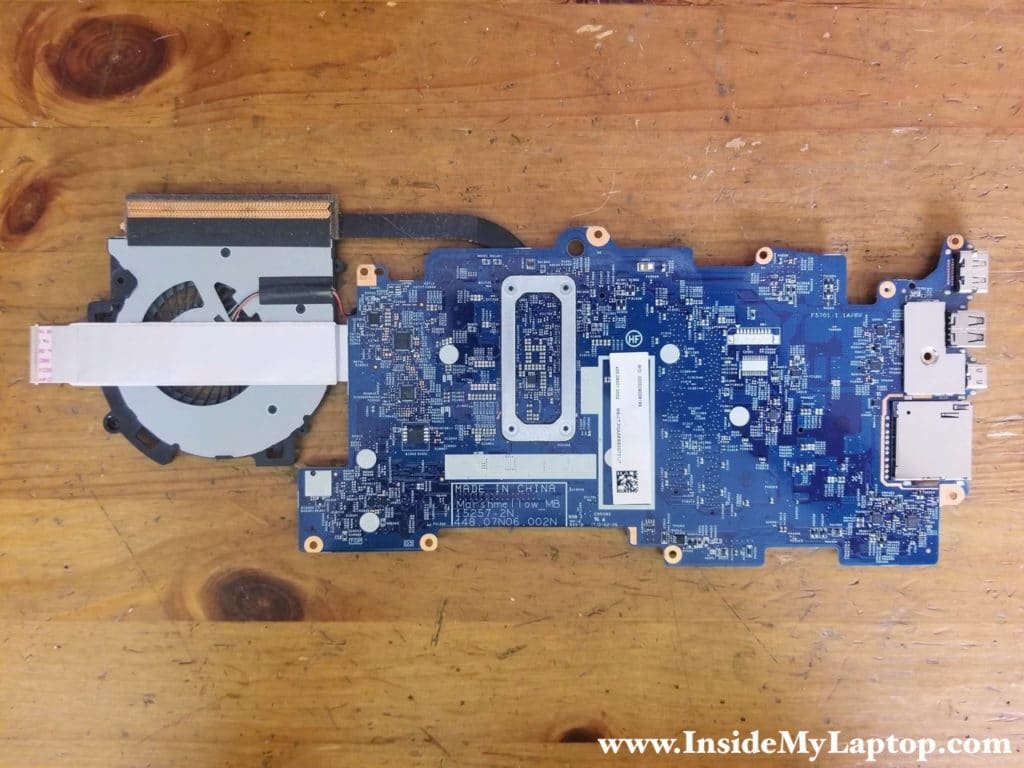
Here's a picture of the hidden side of the motherboard just in case you need it.
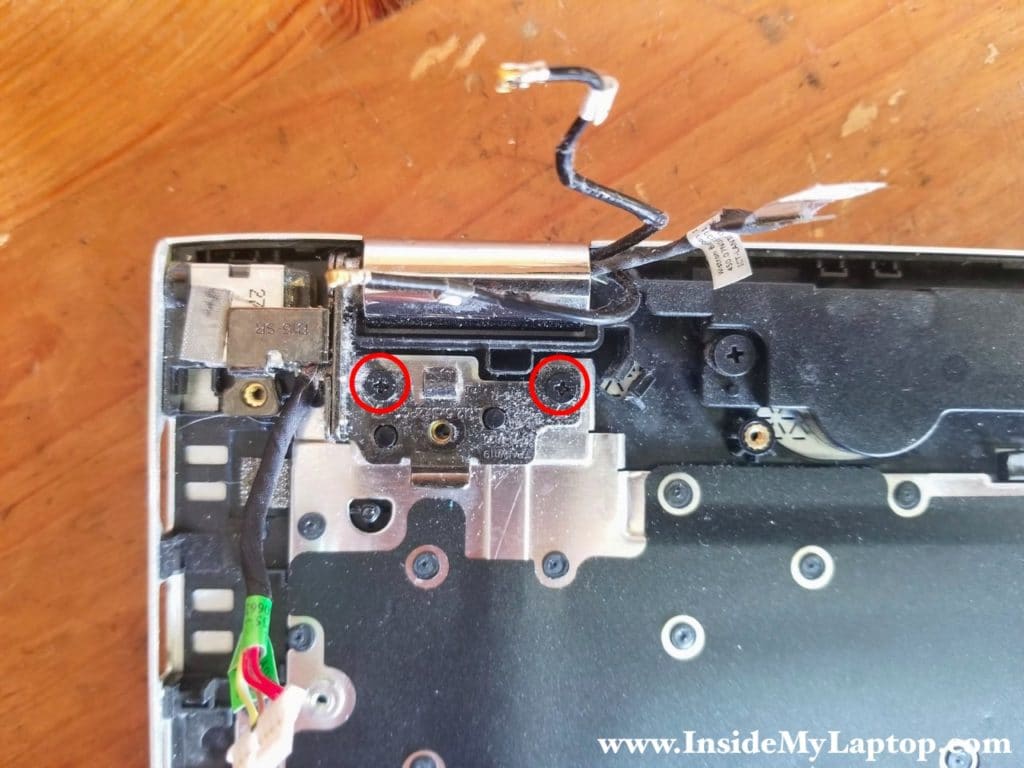
STEP 17.
The DC power jack is mounted under the right hinge. Let's remove the DC jack.
Remove two screws securing the right display hinge.
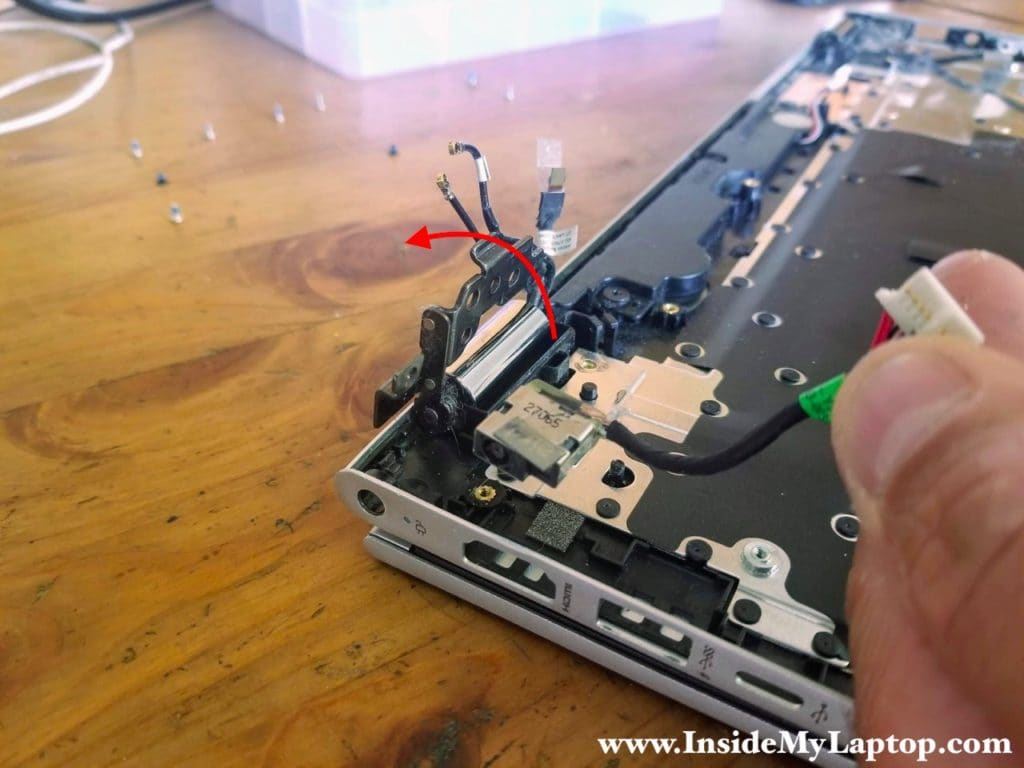
STEP 18.
Open up the right hinge as it shown on the picture.
Now you can access and remove the DC power jack harness.
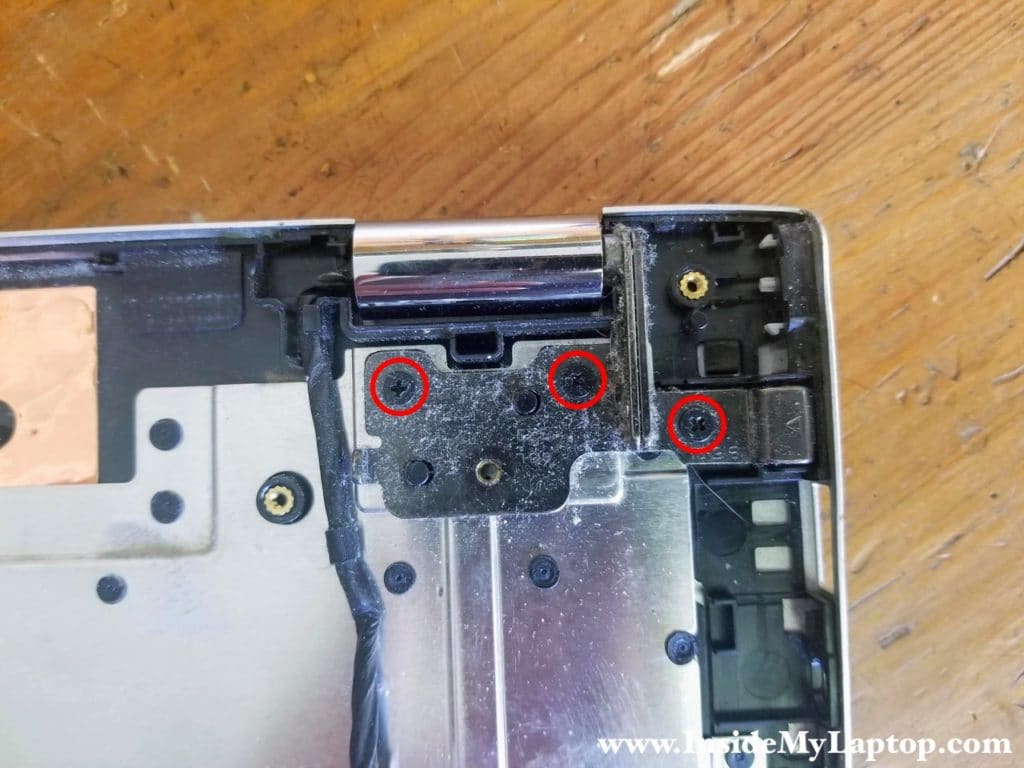
STEP 19.
Remove three screws securing the left display hinge.
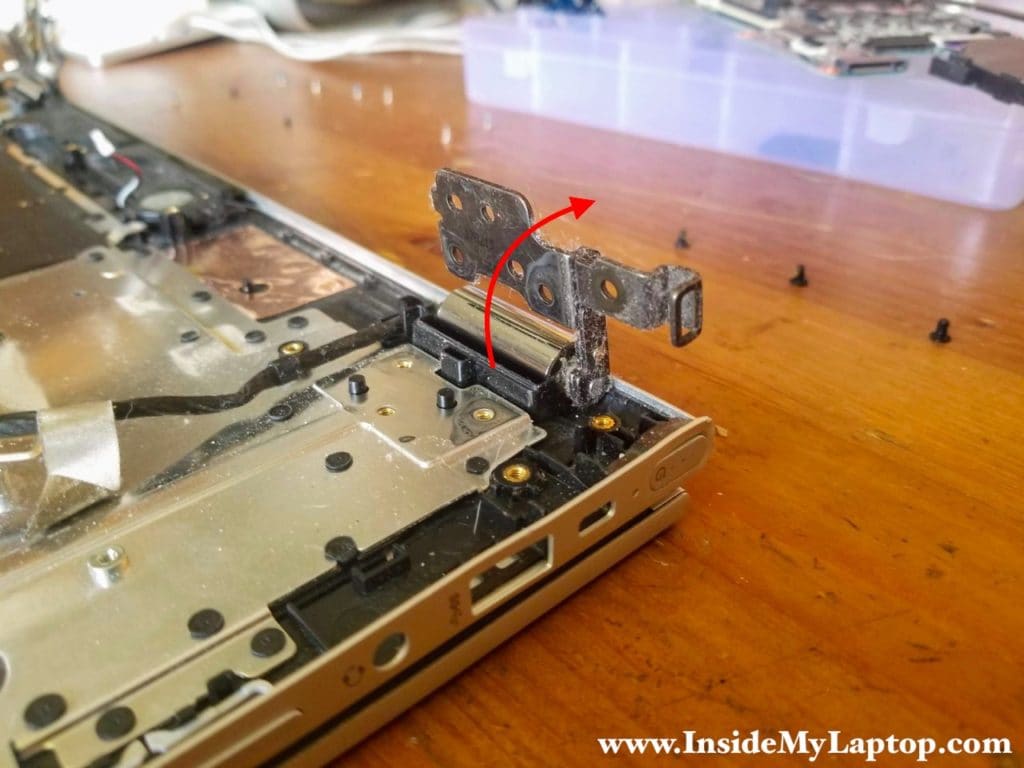
STEP 20.
Open up the left hinge as it shown on the picture.
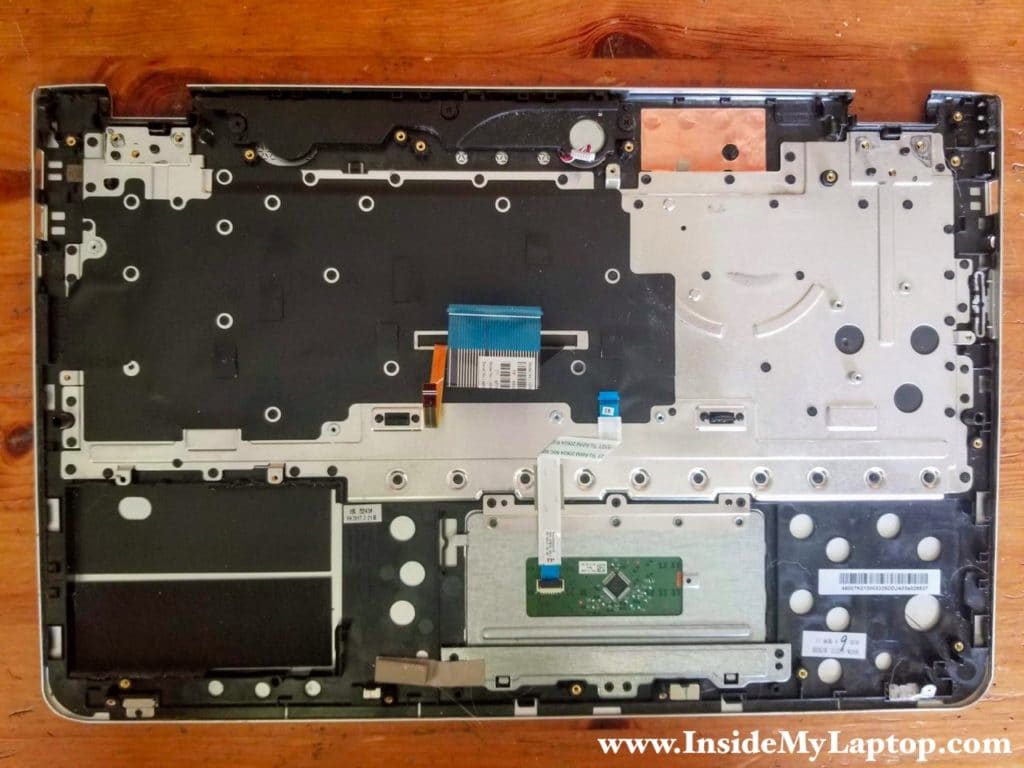
STEP 21.
Now, when both display hinges lifted up, you can separate the palmrest assembly from the display.
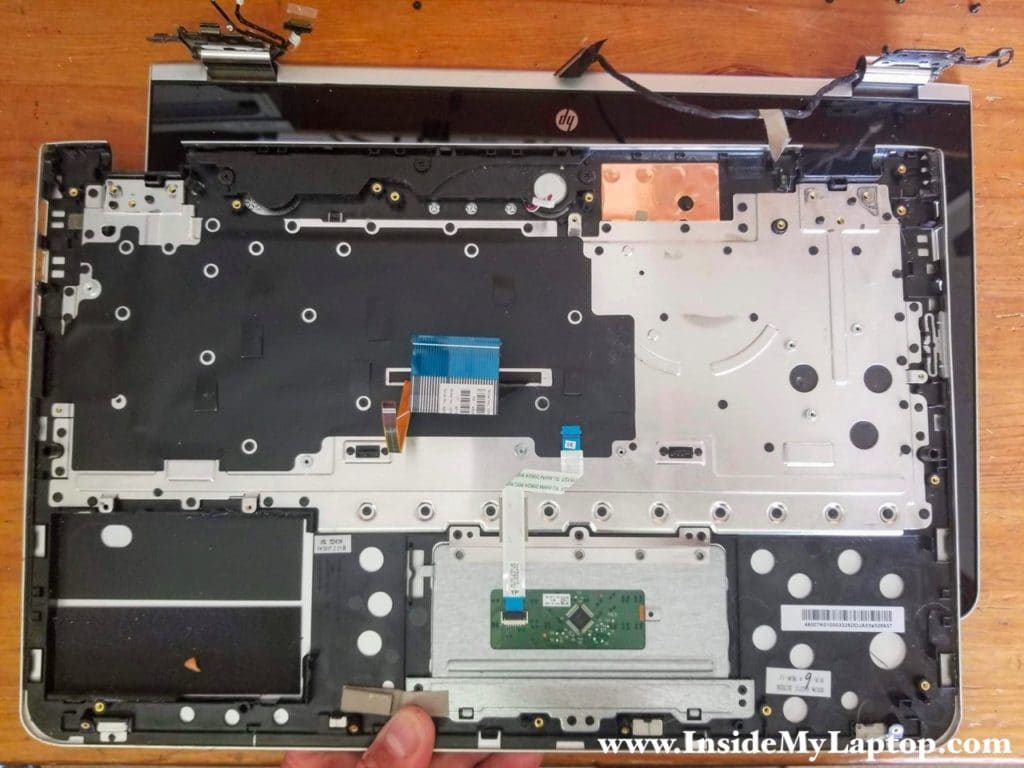
The trackpad can be removed and replaced if necessary.
The keyboard, on the other hand, is permanently attached to the palmrest by multiple plastic rivets.
Here's the official HP service manual (with disassembly instructions and list of spare parts) for HP Envy x360 m6 Convertible PC (model numbers m6-aq1XX and m6-aq0XX).
How to Open Hp Envy X360 M6 Convertible
Source: https://www.insidemylaptop.com/taking-apart-hp-envy-x360-convertible-pc-15-aq155nr/